High-precision and Non-contact
Novel products are designed nowadays with increasing high standards in production and resource efficiency. In many industrial fields such as automotive, aerospace and medical engineering, some new product features are created which can only be manufactured by means of micro and nano production technologies. With it grows the demand on metrology solutions which are able to detect and diagnose the overall quality, geometry and functionality of those products and features.
In the special case of surface measurement, tactile sensors have been until now the measurement state of the art. These sensors conditionally meet certain requirements on precision and sensing force from high-tech products, as the ones with micro and nano features. In addition to that. these sensors are not able to generate as high measurement frequencies as optical sensors.
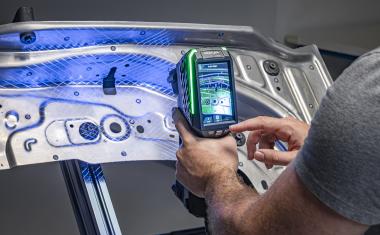
For this reason, the importance of optical metrology has been increasing regularly in the last decade, as this technology provides special features like high precision and non-contact measuring. An example is the inspection of circularity and radial run-out. (fig. 1).
Fiber-based Measurement System
Seeing this demand, the Fraunhofer Institute for Production Technology in Aachen, Germany, developed a fiber-based measurement system for the high-precision measurement of shafts, rollers and machine guides.
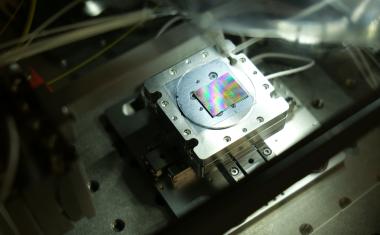
The system is based on the measuring principle of low coherent interferometry, and is composed of two main units. The first one is a Fizeau interferometer, which is connected to the second unit, a Michelson interferometer (fig. 2).
The Fizeau interferometer consists of one optical fiber, and its end face is used as the reference surface. At this surface a fraction of the transmitted light beam is reflected and forms the reference wave package. The remaining fraction is then reflected by the object. The optical path difference between both reflected beams encodes the distance between optical fiber and object. The Michelson interferometer grabs these signals and equals the optical path difference by means of a tilted mirror. The resultant interferogram is captured by a CCD camera and processed with computer software.
The Probes (Fizeau interferometer) are constructed with optical fibers, and, in order to increase their stiffness, carbon fiber and nitinol tubes are used as protection [1].
Measurement Set-up
The Fraunhofer Institute for Production Technology presents at the Control 2009 in Stuttgart, Germany, a high-precision circularity and radial run-out measurement system with non-contact multi sensor monitoring. This set-up demonstrates a solution for the inspection of assembly elements, which have high geometry requirements, as well as for elements with sensible surfaces parameters.
The set-up is constructed in a flat base rack design, where a spindle delivers the torque using a dc motor. For guaranteeing the assessment of a large range of object diameters and rotational symmetric objects, a coupling fixture was used.
The synchronization between the rotation of the measurement object and the measurement frequency is achieved through an encoder. This encoder features a resolution of 0,1° per revolution and generates a TTL trigger signal. The CCD image acquisition process is controlled by this trigger signal and this way sets the measurement frequency as well as the measurement point cloud.
Three fiber-based probes are used in the set-up for the measurement and are switched by means of a fiber optic switcher. Through that the system software is able to change the measurement position. The probes relative Z positioning is calibrated with a certified test body, and so has a defined relation (fig. 3). With this procedure the system is able of fitting a cylinder in the measurement data.
Analysis
The set-up can assess the circularity of an object (every captured circle) and the radial run-out at the same time. The captured circle contains information about the object's form, waviness and roughness, as well as a possible modulation, which comes from a misalignment of the assessed object. This information is evaluated based on the DIN/ISO 12181-2 and 11562 Standards for circularity, and its results are reported (fig. 4).
Another feature of the system is the possibility of a 3D presentation of the measured element, as well as the evaluation of cylinder parameters according to the mentioned DIN/ISO standards.
The radial run-out assessment is based on the system's rotation axis, which is calculated using two captured circles (fig. 5).
Perspectives
For increasing the robustness of the whole system as well as of the probes, further developments at the Fraunhofer Institute are planned. At addition to further research of possible materials for the fiber optical protection tubes, the development of fiber probes adapted for the roughness measurement is also planned, as well as the miniaturization of the probe diameter.
Another research goal is the improvement of the fiber optical switcher, i.e. the increasing of the maximal switch frequency. This way an elevation of the maximal executable measuring frequency would be achieved, as well as an increment of the maximal number of applicable probes in the radial run-out assessment system.
Another application of fiber optics in the metrology is in structure monitoring, using Fiber Bragg Gratings (FBG), which are used in buildings, aerofoils from wind energy plants, pipelines and oil fields [3]. In the field of medical diagnose, fiber optics are applied in optical coherence tomography, for the minimally invasive measurement of biological tissues [4].
References
[1] Depiereux, F., König, N., Pfeifer, T. and Schmitt, R.: „Fiber-Based White-Light Interferometer With Improved Sensor Tip and Stepped Mirror", IEEE Transactions on instrumentation and measurement, vol. 56, no. 6, 2279-2283 (2007)
[2] Schmitt, R., König, N. and Depiereux, F.: „Faseroptische Rundheitsmessung von Bohrlöchern mit kleinem Durchmesser", Technisches Messen, 75 (12), 641-646 (2008)
[3] Nakstad, H.; Kringlebotn, J. T.: „Oil and gas applications: Probing oil fields", Nature Photonics, vol. 2, no. 3, 147-149 (2008)
[4] Reed, W. A.; Yan, M. F.; Schnitzer, M. J.: "Gradient-index fiber-optic microprobes for minimally invasive in vivo lowcoherence interferometry", Optics Letters, vol. 27, no. 20, 1794-1796 (2002)


