Nano-precision metrology of X-ray mirrors
A team from the Diamond Light Source set about creating a brand-new instrument which can potentially improve the toolbox for metrologists and manufacturers around the world.
Synchrotrons work like a giant microscope - they both need mirrors and lenses to bend and shape light. The better control we have over the light source, the more we can see. The quality of images that can be captured using a microscope or a synchrotron rely heavily on the optics used. As technology has advanced over the past few decades and as synchrotron users push the boundaries of what can be achieved, there has been a lot of excitement over the upgrades of synchrotron mirrors and what that can mean for the experiments that can be done.
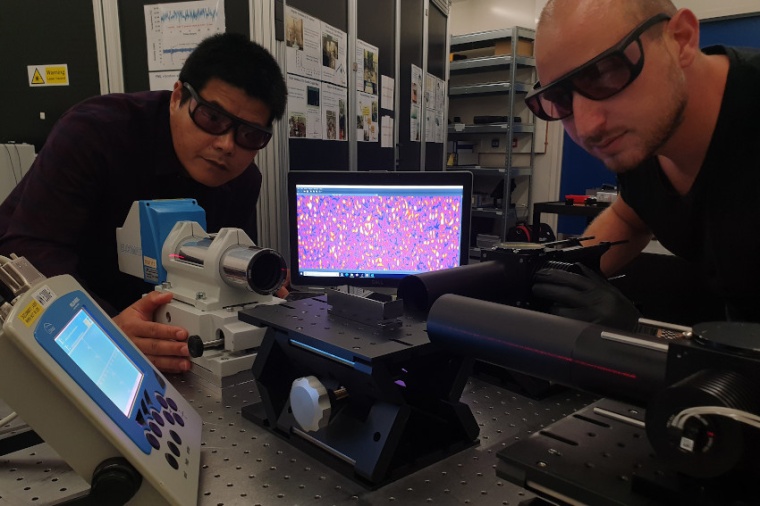
However, there is a bottleneck for the production of new and improved X-ray optics like mirrors. It turns out that it is hard to develop metrology instruments that can validate and measure the quality of new high-precision mirrors. Producing these instruments and alleviating the bottleneck is the goal of the metrology community, as they say, if you cannot test something, you cannot manufacture it. The metrology community has made significant advances by making improvements to existing techniques to test X-ray mirrors. However, a team from Diamond set about creating a brand-new instrument which can potentially improve the toolbox for metrologists and manufacturers around the world.
They used a speckle technique – if you shine laser through a randomly textured material, it will generate speckle. In other words, the beam will scatter randomly, much like the speckles of paint when you flick a paintbrush. Researchers have been able to use algorithms to understand how objects such as mirrors affect the speckle pattern. Understanding how the speckle pattern is changed by an object can help us to improve the measurement accuracy of the manufacture. While this is a well-developed technique for X-ray metrology at synchrotrons, it is impractical for routine metrology. In order to take the measurements, the metrology department needs access to a beamline where time is very precious. If you happen to be a manufacturer of X-ray mirrors, then it is likely that you don’t have access to a beamline at all, and therefore are constrained in the production of very high-quality mirrors. If there are any problems, they will only be discovered when the mirrors are installed, which is too late.
The team set about producing speckle measurement using a visible laser light, instead of X-rays. This presented some challenges as the longer wavelength of laser light could make it more difficult to produce accurate measurements of these high-precision mirrors. However, after several years of work, the team was able to produce high-precision angular measurements using laser light instead of x-rays. The setup for the Speckle Angle Measurement (SAM) instrument is deceptively simple. 2D random intensity patterns (speckle) are generated by shining a laser through a diffuser and they can be treated as multiple pencil beams with different features. Because each speckle pattern has unique features, the speckle may be treated as a set of multiple wavefront markers. Variations of mirror slope over the measured area of the mirror shift the speckle pattern. The slope variation of the surface under test (SUT) can then be measured at the nanoradian level in two dimensions by precisely tracking the speckle displacement with an advanced sub-pixel algorithm.
Hongchang Wang, Senior Optics Scientist, explains the advantages of the new technique: “The speckle-based metrology instrument, SAM, we have developed is a compact, low-cost instrument and allows accurate measurement of strongly curved mirrors in two dimensions with a precision of nanometers. This is a feature that most existing metrology instruments lack and therefore bridges the gap faced in their capabilities by the x-ray mirror metrology community.” This shift of the technique to visible light creates a lot of opportunities for the metrology community in the future. Now, there is a new tool that can be used, and improved for the measurement of high-precision optics. The fact that a beamline is not required to make the measurement is also a significant benefit to companies who manufacture mirrors as they will have the opportunity to do better quality control on their products before they are shipped. It is hoped that techniques like this will help to raise the baseline for the production of X-ray optics in the future.
Kawal Sawhney, Optics and Metrology group leader at Diamond, adds: “This novel instrument will enhance the capabilities of our state-of-the-art metrology laboratory at Diamond and enable us to metrology test the extremely high-quality x-ray mirrors required for use with the planned upgrade of Diamond to a low-emittance Diamond-II source. Vendors of x-ray mirrors will also find this new instrument attractive as it will enable them to fabricate even better-quality optics than at present.” (Source: Diamond Light Source)
Link: Optics and Metrology, Diamond Light Source Ltd, Harwell Science and Innovation Campus, Didcot, UK


